Please note: This content is intended for Practifi System Administrators and is technical. The steps described in this article may not be completed without System Administrator permissions. Please discuss your integration installation plans with your Practifi Customer Support Team for their assistance.
Overview
With our Egnyte integration, you can manage client files and folders in Practifi and keep document workflows connected to the client records they support. Folders are automatically created for each client record, so you can upload, edit, and delete files without leaving the application. This article outlines the steps for enabling the Egnyte integration in your Practifi organization. For information about using the integration, please consult our Using the Egnyte Integration article.
- Installing the Salesforce Application
- Assigning User Permissions
- Connecting to Egnyte
- Adding the Egnyte Section to Client and Prospect Records
- Disabling Deletion of Notes, Files, and Attachments
- Enabling Metadata
Installing the Salesforce Application
- Click here to view the Egnyte for Salesforce application. Alternatively, open the AppExchange list from under Salesforce Classic.
- Click Get It Now and then enter your Practifi Salesforce credentials if prompted.
- You will be prompted to provide the name of the Egnyte server you wish to set up. This name becomes part of the URL your firm will use to connect to Egnyte (for example, ABCDocuments.egnyte.com).
- Select Install in Production and then click Confirm and Install.
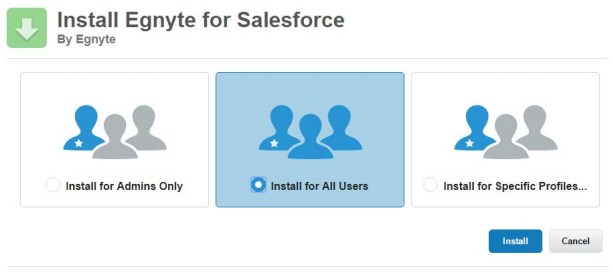
- Select Install for All Users, then click Install. The installation process may take some time to complete.
Assigning User Permissions
- From Practifi, click the cog icon in the upper right-hand corner and select Setup from the sub-menu.
- In the Quick Find search bar on the left-hand side, search for and select Permission Sets.
- Click the Egnyte User permission set.
- Click Manage Assignments.
- Click Add Assignment.
- Select the users you wish to have access to Egnyte, then click Assign. If the user needs to add the Egnyte component to Lightning panels, they should also get the Egnyte Administrator permission set.
Connecting to Egnyte
Please note: When you reach the step to authenticate the Egnyte domain below, the redirection step may fail in Chrome. If you encounter this, return to the step, log in to Salesforce from another browser (for example, Firefox), and open the Egnyte app.
- From Salesforce Setup, click the App Launcher and search for and select Egnyte.
- In the Egnyte app, click the Egnyte Domain Configuration tab, then click the Remote Site Setting button.
- For the EgnyteDomain Remote Site, complete the form per the screenshot below, then click Save. The Remote Site URL is your Egnyte URL.
- Return to the Egnyte Domain Configuration tab and click the Edit button.
- Enter your Egnyte domain into the Egnyte Domain field. Your domain is the word that appears before ".egnyte" in your Egnyte URL. After clicking Save, you will be redirected to an Egnyte login page.
-
On the Egnyte login page, enter your credentials to sign in to Egnyte.
Please note: The credentials provided must belong to an Egnyte administrator account, and that account must not have two-factor authentication enabled.
- This redirection process often returns an error message when using Google Chrome, so if you encounter any issues, try a different browser.
- The administrator account may already exist at the firm. If the firm initially set up their Egnyte server as a Trial through the Egnyte website, this will be the user created at that time.
- Once this process is completed, you will return to Salesforce with a message bar and a Continue button. Click Continue to complete the step.
An example of a correctly configured EgnytePackage Remote Site would appear as follows:
Adding the Egnyte Section to Client and Prospect Records
The required steps are detailed in the documentation available to the Practifi Customer Support team. The steps the team will complete are essentially as follows:
- First, locate a Client record in Practifi. This can be any Client record.
- Click the Setup icon and select Edit Page.
- Search for the Practifi - Navigation Section component in the left side search bar, then drag and drop the component over the Activities navigation section.
- Give the component the title of Egnyte and set the Icon field as fas fa-star-of-life.
- Search under Components and select the EgnyteComponent element. Drag this element to the Egnyte navigation section.
- Upon clicking Save, a message to activate the updated page will appear. Click Activate, and select Assign to App, Record Type, and Profiles.
- Under the App selections, select Advisor, Client Service, Management, and Marketing apps. Click Next.
- Select all Form Factors, and click Next.
- Under Select Record Types, select Individual Client, Household Client, and Organization Client, and click Next.
- Under Selected Profiles, select Standard User and System Administrator. Click Next. Review the Assignments, and click Save.
- Repeat the steps, first locating a Prospect record in Practifi.
- Add the Egnyte section and EgnyteComponents to the layout.
- When selecting Record Types, select Household Prospect, Individual Prospect, and Organization Prospect, and click Next.
- Finish the remaining steps.
Disabling Deletion of Notes, Files, and Attachments
By default, the Egnyte integration is configured to delete notes, files, and attachments from Practifi after they are uploaded to Egnyte. To retain these items in Practifi as well:
- In the Egnyte app, click the Egnyte Sync Configurations tab.
- Click the caret and switch the view to All.
- Click the Account hyperlink.
- On the Account page, click the Edit button.
- On the edit screen, uncheck the Delete Notes and Delete Files & Attachments boxes, then click Save.
Enabling Metadata
The integration between Practifi and Egnyte allows for additional metadata from Practifi records to be included with files, notes, and attachments when they are transferred over to Egnyte, preserving the connection to the originating record after the file leaves Practifi.
Please note: Configuring this feature requires selecting which fields to include. For assistance, please reach out to Egnyte support.
Comments
Article is closed for comments.